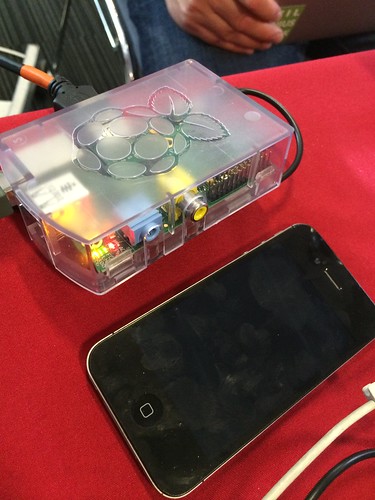
After having my Raspberry Pi sitting quietly in the corner for quite some time
I recently heard Dave Starling talk about
running Couchbase Lite on it and just had to
try it out. After all having a small embedded database sounds perfect to the
Pi and I can think of a couple fun projects with it, from dashboards to home
automation, to the intelligent fridge ;). Also with DevoxxUK
coming up, this sounded like a perfect talk subject for a quick 15min session.
So what is Couchbase Lite?
Couchbase Lite is a NoSQL database, for mobile and embedded devices. Similar to
using SQLite you add a library to your project and now you have a database
available to you, but unlike SQLite it provides additional syncing
capabilities, and stores JSON documents instead of Rows. So what does that give
you? Basically it means that you can use JSON APIs directly and store the
results in the database, which makes building such apps much easier. Also
having syncing done for you means that you can just work with your data locally
like you always were, but have it available on every device connected, be it
Android / iOS / Windows Phone and of course the Raspberry Pi, even if you are
offline. This works via the so called
sync_gateway which takes care of
the nitty-gritty details of sync and managing conflicts as well as the
connection to Couchbase to keep the data available on
your severs.
Running
Couchbase Lite + JRuby on MacOS from Philipp Fehre on Vimeo.
OK let’s build something!
Since there is a full Linux, in my case Raspbian, running on the Pi you can
develop in any language you like, but Couchbase lites portable version is
written in Java, so the way to go for me was using JRuby. JRuby lends itself
quite nicely to trying stuff quickly without the overhead of setting up a big
project, and since it provides great interoperability with
Java, using any of
the Java libs is very easy.
So what are building?
As shown in the video we will create a small messaging app, which works cross
platform and even if you are offline. The idea is to store all the messages in
the local Couchbase Lite database and have it sync with a server somewhere on
EC2, which in turn all clients subscribe to. The full final code is available
on github. Just to quickly
review what you need to follow along:
- JRuby (http://jruby.org)
- Raspberry Pi running with Raspbian or a Mac running OSX
- A sync gateway instance, you can get one by signing up to
CouchbaseCloud
Let’s get started!
Loading in all the dependencies
Couchbase Lite has some dependencies, and we first of all need to make sure all
the needed jars are loaded, for the most part those are plain java jars so
there is no need to do anything platform specific, so simply loading the whole
directory works fine.
http://gist-it.appspot.com/github/couchbaselabs/pi-on-couch/blob/master/app.rb?slice=17:18
There is one natively compiled dependency so which needs some special attention to be loaded
depending which platform you are on. In this case detecting the OS as well as
the CPU platform let’s us get the right jar loaded. I compiled the
couchbase-lite-java-native
in for Raspbian and the linux-arm platform, as well as for MacOS so
the application runs on either and load depending on which platform the app currently runs on.
http://gist-it.appspot.com/github/couchbaselabs/pi-on-couch/blob/master/app.rb?slice=19:26
Compiling for additional platforms is simple as well, just checkout the code
and run $ gradle jar, in case of the Raspberry Pi you might need
to adjust the build.gradle file according to the
crosscompile-build.gradle and include the paths for the compiler
as well as the path to jni.h. Take a look the compiler settings
in this case
http://gist-it.appspot.com/github/couchbase/couchbase-lite-java-native/blob/master/crosscompile-build.gradle?slice=51:64
And make sure it finds the required JNI header
http://gist-it.appspot.com/github/couchbase/couchbase-lite-java-native/blob/master/crosscompile-build.gradle?slice=118:132
With this out of the way we can start using Couchbase Lite in our application.
Initialize the application
Using the database from within the application requires some setup during the initialization.
http://gist-it.appspot.com/github/couchbaselabs/pi-on-couch/blob/master/app.rb?slice=149:156
We need to get access to a JavaContext first, which is similar to
an Android Application Context, and is needed to provide a basic information for
the whole application. This contains elements like the directory for data
storage and alike. We also need to make sure to get the java String object from a URL string
used as the location of the Sync Gateway, which we will talk about shortly.
Lastly the manager is used to acquire the actual database instances, and handle
access to them. Getting access to the Database via the manager is done by
simply getting the database with a given name, in case the database is not
present already it will be created for you and stored on disk in the data
directory, which defaults to the current application directory.
http://gist-it.appspot.com/github/couchbaselabs/pi-on-couch/blob/master/app.rb?slice=160:169
Setting up the sync
The ease of sync is one of the big advantages Couchbase Lite has, so let’s set
it up. First we need some backend to sync with. If you just want to try it out
take a look at Couchbase Cloud which
let’s you setup a sync_gateway with just a few clicks, or just run it locally,
by downloading form Couchbase Mobile, soon
sync_gateway will also be available in
homebrew for MacOS. After
this is done just grab the URL and point the app to it.
http://gist-it.appspot.com/github/couchbaselabs/pi-on-couch/blob/master/app.rb?slice=27:28
Now all is left is to create two replications one to pull data from the remote
whenever there is a change, and one to push our own changes up.
http://gist-it.appspot.com/github/couchbaselabs/pi-on-couch/blob/master/app.rb?slice=169:181
And finally we need to handle any changes which get passed along, this is done
by implementing a so called ChangeListener Interface which just
needs to implement one method void change(ChangeEvent event) which
gets called for every change being replicated. I our case we just log the
change and update the UI as needed. Since this class is implementing a
Java Interface we also need to include some annotations for JRuby to handle the
interfacing with Java correctly, mainly annotating the method with the type
signature required.
http://gist-it.appspot.com/github/couchbaselabs/pi-on-couch/blob/master/app.rb?slice=61:77
And with this we are now ready to create and read the data.
Reading and writing data
When writing to couchbase lite we need to create a document first and than save
the data to it.
http://gist-it.appspot.com/github/couchbaselabs/pi-on-couch/blob/master/app.rb?slice=50:59
In this case we create a document in the given database with the provided text.
The type of the document is set to message. The type is no special property but it
is common to set it because it allows us to filter more easily later as there
are more different types of documents stored in the database. Now to read the
data out we could either do so via the document id which is assigned on
creation or by creating a query. Since we want to display all the documents it
makes sense to create a query which reads all the documents and stores them in
an array.
http://gist-it.appspot.com/github/couchbaselabs/pi-on-couch/blob/master/app.rb?slice=40:49
Couchbase Lite allows for more advanced queries using Map Reduce and also for
live updating queries, but for this simple application this approach will be
sufficient.
Displaying the results in the UI
Now that everything is in place we can create a UI using Swing to actually
provide us with the needed interactions. This is rather simple so I’m not going
to walk through all the code, the important part is to setup a listener to
actually create new messages as the user presses send.
http://gist-it.appspot.com/github/couchbaselabs/pi-on-couch/blob/master/app.rb?slice=77:123
And adding rows to the created table as the new data rolls in
http://gist-it.appspot.com/github/couchbaselabs/pi-on-couch/blob/master/app.rb?slice=126:139
Thats it a quick and simple messaging app, runnable on a Raspberry
Pi, MacOSX and basically anywhere there is Java.
Conclusion
Getting up and running with JRuby and Couchbase Lite on the Raspberry Pi is
really simple, the JVM comes pre-installed and JRuby is just a download away,
this opens up the Raspberry Pi to a nice set of applications with the ability
to operate on the data locally without having to worry about the syncing
yourself. I’m already looking forward to some home automation, dashboards and
alike interfacing with my iPhone or Android Tablet, maybe I finally get my
intelligent fridge? ;).
Resources


